One of the reasons many lifters either love or loathe the deadlift is because it is such a raw test of physical and mental strength. There are no grey areas. Either the bar leaves the floor, or it doesn’t.
The deadlift is a multi-joint movement that targets the hamstrings, quadriceps, glutes, calves, core and back. It is one of the best exercises for building muscle mass and increasing your strength.
Read on to learn more about proper deadlift set-up, form and top tips to help you improve your deadlifts.
Why should you deadlift?
The deadlift targets every muscle in your body. It is a functional movement that benefits your day-to-day.
Carrying groceries, playing with your children, or doing household chores – you’ll be amazed how improving your deadlift form and strength carries over into all kinds of daily activities.

Deadlift set-up and movement
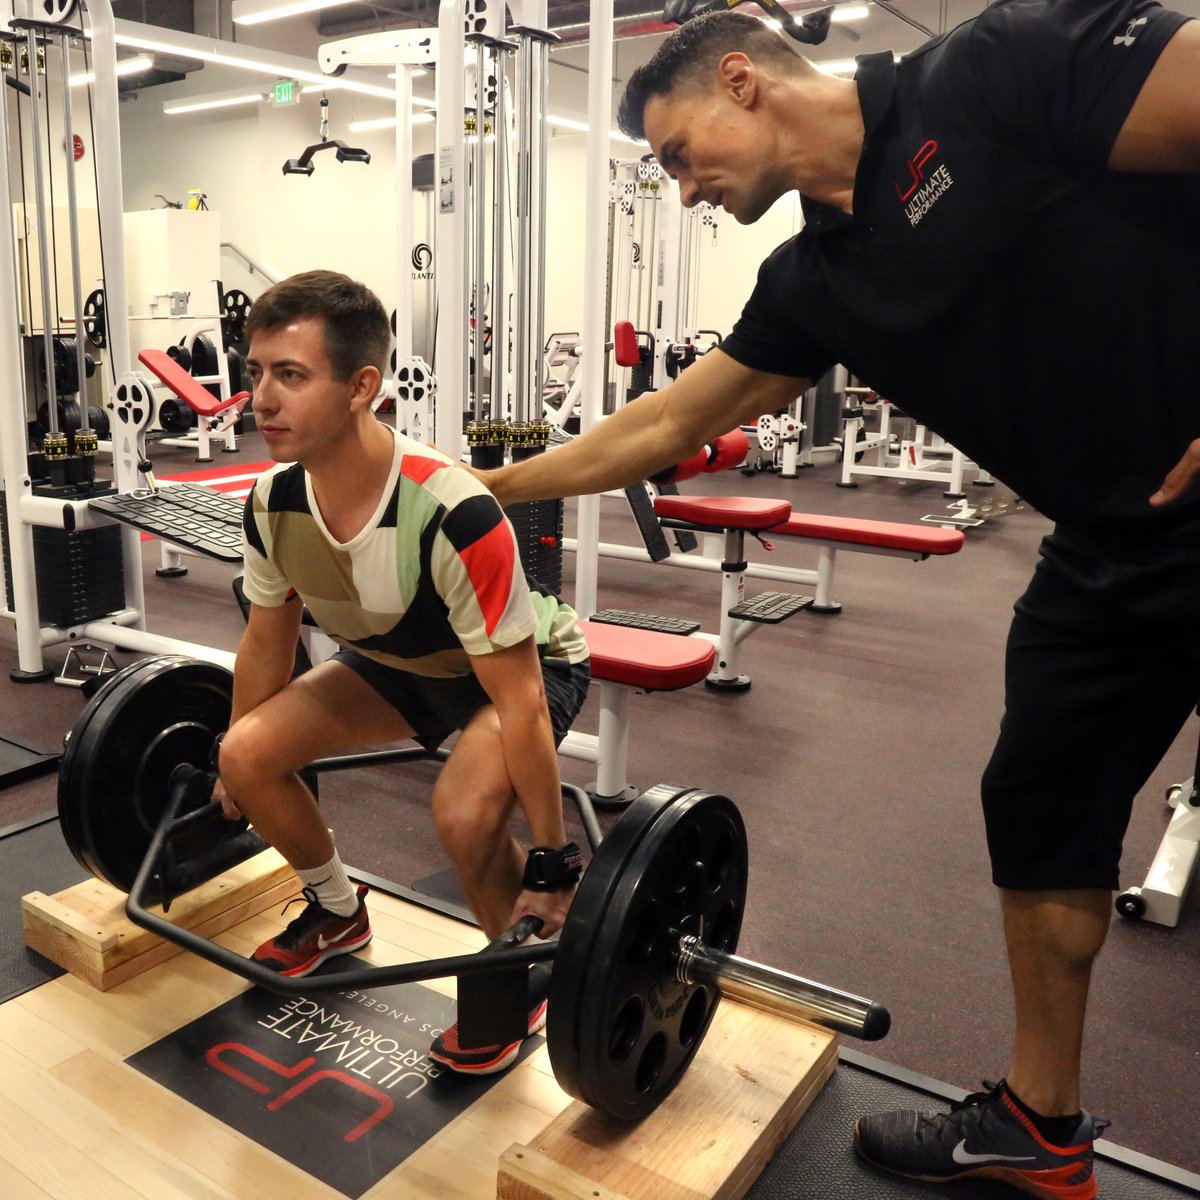
As with every big lift, the set-up is crucial. Before you even think about lifting the bar off of the floor, consider these points:
- Use bumper plates when loading the weight onto the barbell. This will reduce the impact when the weight hits the floor, which is better for joint health.
- Stand in the middle of the bar with your midfoot directly underneath.
- With an overhand grip, grip the handles outside hip-width apart.
- Bend at the knees and hips and pull yourself down so that you can retract (pull back) and depress (push down) your scapula (shoulder blades). Make sure your spine is in a ‘neutral’ position.
- While keeping your arms straight, pull tight on the bar so there is no ‘slack’. You should be able to feel the weight of the bar and brace against it. Squeeze your arms against your sides, imagining your holding something tight in your armpits. This should help keep your shoulder blades in place and help activate your lats.
- Tense your triceps to keep your arms straight. This is the start and finish position for each rep.
When performing the deadlift movement, first ensure that you have flat-soled shoes. These are better for stability compared to running shoes with a cushioned sole.
Once you have nailed your set-up, you can begin the deadlift movement:
- Stand up by pushing your legs into the floor and pushing the hips forward (‘opening up at the hip crease’).
- While keeping the spine locked in a neutral position, focus on pushing through the centre of your feet. When upright, do not lock out your knees – keep them slightly bent.
- Return to the start position by bending at the knee and at the hip. Avoid bouncing the weight onto the floor.
- Repeat for the desired number of reps.
Now that you understand the basics of a good deadlift set-up and movement, here are 12 tips to help maximise and perfect your deadlift form.
1. Centre the bar before you deadlift
To achieve your biggest deadlift, the bar must stay close to the body and travel the shortest distance possible.
This means that any deviation of the bar from the centre line will result in less weight lifted. To achieve this, the barbell should go through the centre of the foot on set up.
The mistake most people make is that they put the bar in the middle of the forefoot rather than the middle of the whole foot. It should bisect the arches of the feet. When set up correctly, your shins will be very close to the bar, perhaps only an inch or two away before you bend to grab it.
2. Improve your grip before you deadlift
One weak link in the chain will halt progress, and that link is often grip. The stronger your grip, the stronger your lift will be. Your nervous system won’t recruit the maximum amount of muscle mass if you are unsure of your grip.
A quick way to assess if your grip might be the limiting factor for your deadlift is to use lifting straps. Try using straps on a weight you’ve previously failed to lift. If it goes up easy, you know that it wasn’t your total strength that was lacking; it was your grip.

3. Pin the bar to you before you deadlift
Though a deadlift should never have a ‘hitch’ up the thighs, you must keep the bar as close to you as possible. This means keeping constant contact with your legs throughout the movement. The odd shin scrape from the bar will happen if you keep the bar close enough to your body.
The increase in the forces placed on the lower back is huge if the bar drifts slightly forward away from that contact with the body. With maximal weights, such as a one-rep max, this will cause you to miss your lift.
If you are going for reps, it will cause your back to round and undue stress to be placed on the spine.
4. Get low to the floor before you deadlift
Take those spongey running shoes off.
If you’re lifting with soft-soled trainers, you’ll add a lot of weight to your deadlift by removing them: This is for three reasons.
The first is that you’ll have less distance to move the weight. Some trainers could be adding two or three centimetres of height that you now need to move the weight over. It might not sound like much, but it can make a big difference.
The second reason removing your trainers will help your lift is they absorb some of your force. If the soles of your trainers are soft because they are designed to absorb the forces of running or similar activities, then they will also be absorbing some of the drive for your deadlift. When you try and jump in the air while standing in deep sand, you’ll not jump as high – the soft surface under your foot reduces your power. The same thing happens with running trainers and lifting.
The third reason is stability. If your weight shifts to one area of the foot more than another during your lift, the soft sole of the shoe will collapse in that area, leaving you off balance. If you’ve got an unstable base, you’ll lift less weight.
You’ll generally see the best dead lifters going barefoot or wearing trainers with very low, flat soles for these reasons.

5. Nail your deadlift set-up
Your deadlift set-up will depend on your range at the hips and from what stance and height you can reach the bar with a neutral spine (imagine a broomstick passing from your head down to your tailbone).
If you are lifting from the floor, try a conventional deadlift stance (feet hip-distance apart) and check the spine. If it is neutral, great. If not, take the feet slightly wider until you can hold the bar with a neutral spine. If you can’t do so without flexing the spine, try a semi- ‘sumo’ stance.
Blocks can be used in all deadlift variations to raise the bar so you can maintain a neutral spine.
6. Dead stop your deadlift
It’s tempting to give the bar that slight bounce when going for reps on the deadlift. However, you’ll get more long-term benefits from putting the weight down and resetting your position. Not only does this help you practice your set-up, but it also eliminates weaknesses from the floor. If you bounce the weight when going for reps, you’ll limit your deadlift significantly.
Resetting each time will also let you practice getting tight through your entire body and pulling the ‘slack’ from the bar before lifting.

7. Heavier deadlifts are not always better
You need to practice your deadlift to build optimal technique. These tips will mean nothing if you don’t practice. As the saying goes, practice doesn’t make perfect – perfect practice makes perfect.
Are you really going to have perfect technique performing extremely heavy reps?
Every lift above 70% of your one-rep max will increase strength. If you can deadlift 140kg for one rep, performing reps with 98kg and above will still build more strength. The benefit is that the reps using lower weight will look a lot better, and you’ll be drilling your perfect technique.
You will also find your deadlift fatigues when performing high reps, even with lighter weights. In this case, you’re better off performing low reps with the lighter weight, stopping well before any failure of good technique.
Especially if you are a novice lifter, more practice will be beneficial.
8. Film your deadlift sets
We’ve all looked at someone else doing deadlifts that are ugly as sin and just cringed. Our deadlifts would never look like that, right? Don’t be so sure.
If you want to change something, you must measure it. You should be tracking the sets, reps and weight lifted for your workout, but recording the reps doesn’t record how those reps looked.
If you want to improve your deadlift, that isn’t just about improving the weight moved; it’s about making it a better lift. The better your technique, the more weight you will ultimately be able to get off the ground. Filming your lifts will allow you to track the progression of your technique.
The other advantage of filming your lifts is that it will help you identify the areas you need to work on. Is the lift slower or more of a struggle at the beginning, middle, or end? Which part of your form is collapsing and needs further work?
When filming, make sure you film at a perpendicular angle to your lift. If you film at a 45-degree angle or have the camera too high or too low, it’s very difficult to assess what might be going wrong. This is because the wonky camera angle makes everything look wonky.
9. Proper breathing is important for your deadlift
The deadlift requires a lot of intra-abdominal pressure and stability therefore, proper breathing technique is important.
The purpose of an abdominal brace is to create as much pressure as possible within the abdominal cavity. This cavity forms a ‘box’, which is composed of the multifidus (the deepest muscles of the lower back), the transverse abdominis at the front (the deepest layer of the abs), and the diaphragm at the top and the pelvic floor at the bottom. When this box is filled with pressure, you have a solid structure which is difficult to break.
So, how do we do this?
Focus on big, deep breathing and exhaling the rib cage expanding and the diaphragm. Practice bracing by laying down on your back, taking big slow breaths in and long deep breaths out.
Repeat this three to four times, making each rep bigger and deeper. On the last rep, breathe in as deeply as possible and then hold for five to ten seconds. That is your brace for the main lifts.
If you are bracing effectively, you should feel like you’ve run a mile after performing a set!
10. Fix those caving knees when you deadlift
If you find your knees cave and fall inwards when performing a deadlift (knee valgus), try making your stance narrower if you have the range at your hip and ankle to allow this. Focus on applying pressure on the outside of your feet and ‘spread the floor’ when you lift. It is important to address your knees caving in and align the knee and ankle joints to prevent injuring your knee.
Remember not to lock your knees at the top of the deadlift.

11. Finish your deadlift strong
Once the bar passes your knees, you want to think about pushing your feet through the floor and squeezing your glutes to get your hips under the bar. Be careful not to hyperextend your back at the end of the movement.
Hyperextension is usually caused by relaxing the brace on your exhale. To avoid this as the set progresses, take time to reset at the top of the rep rather than rush and risk your brace failing.
12. Don’t drop your deadlifts
Control the weight as you lower it. The eccentric phase of the deadlift (when you lower it) is just as important as the initial lift off the floor. When you drop your deadlift from the top, you are not only cutting your time under tension, but you are at risk of injuring yourself too.

How often should you deadlift?
Finding the right frequency for different lifts is the key to fast progress, as heavy deadlifts are very taxing on the nervous system.
Your optimal frequency will depend on the intensity of your lifts, i.e., how heavy you are lifting in relation to the rep range.
The heavier the weight, the higher the risk-to-reward ratio. Very heavy loading comes with a higher risk of injury and requires more rest between sets for the nervous system to recover.
The deadlift is a highly complex movement that requires a lot of coordination, so your technique can start to fail at very high rep ranges. Poor form can increase the risk of a serious back injury in a deadlift, so high rep training is not advisable. This is why the deadlift is generally performed in lower rep ranges at heavier loads, which requires longer recovery.
However, there are many deadlift variations, such as Romanian deadlifts or rack pulls. Depending on the rep range and the intensity, these exercises can be used to help ‘assist’ a conventional deadlift.
These exercises can provide practice in the movement and can help to increase training volume at lighter intensities without overly taxing the nervous system.
Bear in mind that it would be optimal to split these exercises across several days, with at least 24 hours between sessions.
This will vary from person to person.
TRAIN WITH ULTIMATE PERFORMANCE
Want to work with the world’s leading personal trainers?
Book a free consultation today and join the 25,000 others who have built the physiques they’ve always wanted.